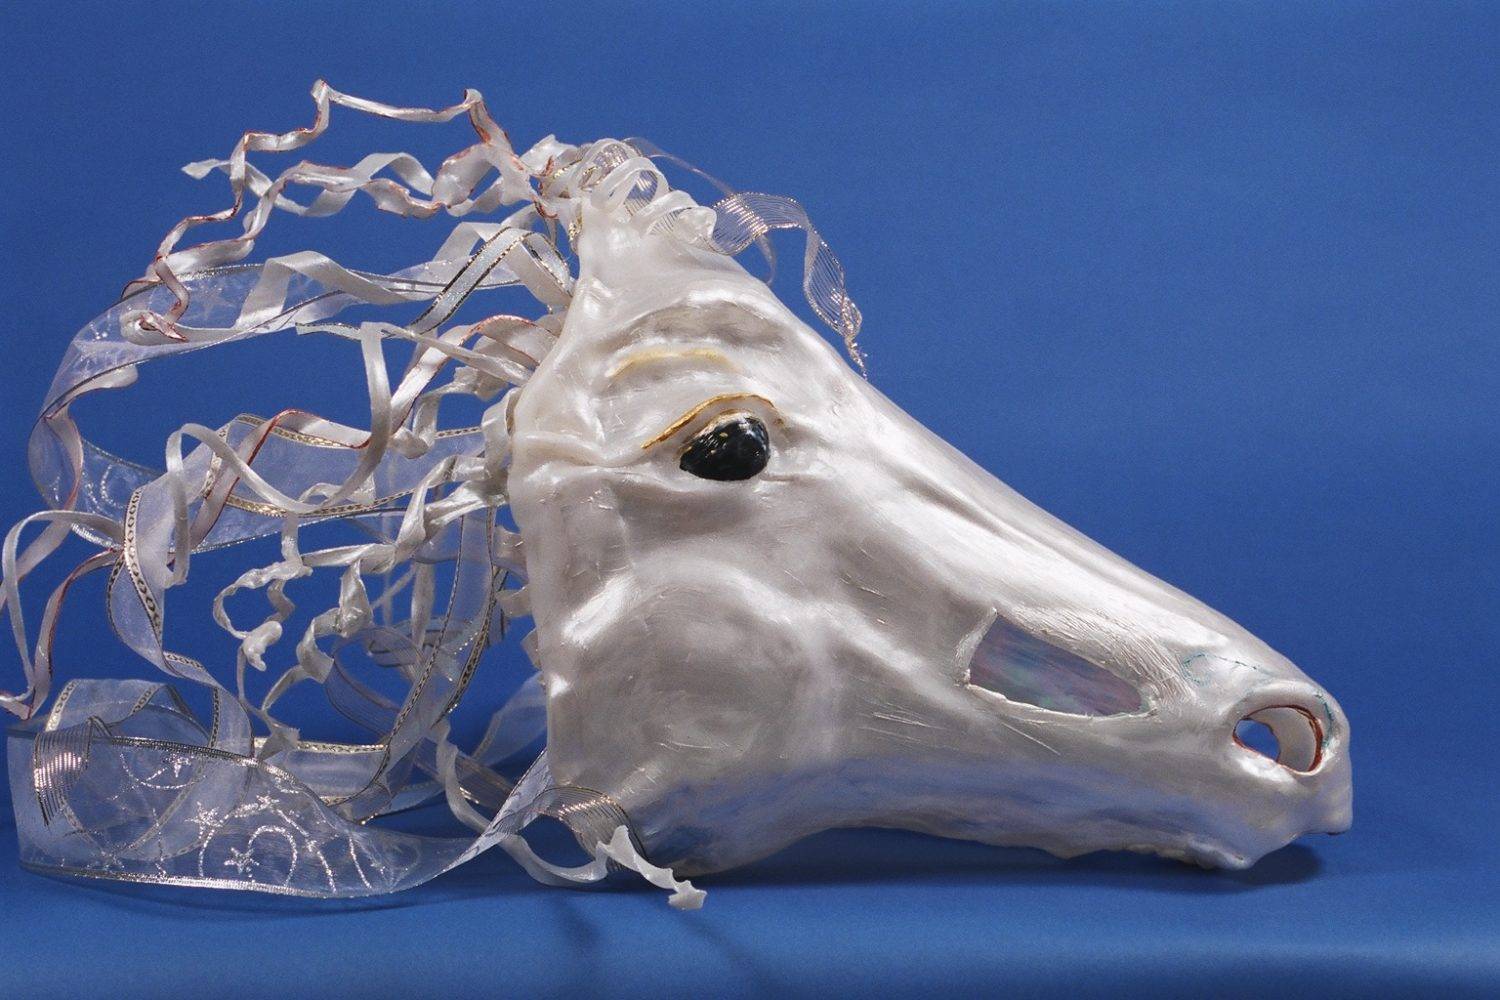
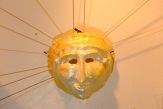
 I am typing this from the set of a small film version of “Riders to the Sea”, that rich Irish play by Synge written in 1904. As a result of this project, I have been spending a great deal of time lately thinking about Ireland, Irish history, and deeply held cultural beliefs and values… and realizing that despite my readings and visits and conversations, my deeper connections and understandings arise out of a mask project I did there, working with an artist/historian as a mentor, and spending a great deal of time trying to capture’ the spirits of the beings in the stories in the masks I made. 12 years later, these masks in turn are being used by children in a mask-making and performance class, and it is wondrous to see them spring to life once more.
How can masks live so long and be used by many people without posing a health risk? They are made of Aquaplast. This blog, therefore, is devoted to Mask-Making Tips with a focus on Aquaplast. For tips specific to making masks with paper maché (or papier maché) or manila folders, check out the earlier mask-making blogs!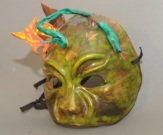
ARTS AVOCATING MOMENT: recent research on the impact of an arts-rich learning environment on the academic success of Youth at Risk shows that test scores, GPA, and enrollment in upper-level classes is increased, and the impact on graduation is to increase likelihood by 5 TIMES. Here’s the link: http://www.arts.gov/research/Arts-At-Risk-Youth.pdf
So go for it!!!
Aquaplast: What is it?
 Aquaplast is a medical plastic that becomes pliable when immersed in boiling (or near-boiling) water. It comes in different types, each of which has different shaping/molding properties. It’s made by Sammons Preston Rolyan, and can be purchased online from any large medical company (like Patterson Medical or Sears or MedexSupply).
What are the pros and cons of using it?
Pros: There are two biggies (and a couple of “smallies”). One, it is an ideal material if you are looking to build a permanent collection. The plastic is durable and hardy, can sustain being dropped or even sat upon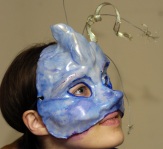 by accident, and if properly cared for, can be beautiful and useful for decades. Performers love masks with ‘personal’ histories! Two, these plastics can be cleaned. That means that people can safely share a mask, which is critical for schools and universities. Small advantages are 1) heating and molding the plastic goes very very quickly. It cools in less than a minute! If you have 2 or 3 heated water stations, an entire class can complete the ‘work in plastic’ stage in 40 minutes; 2) with a couple of the types of Aquaplast, you can toss the plastic back into the water if you messed it up and have another go at it; 3) given samples/scraps to experiment with in advance, students can create extraordinary things, as the material itself is a joy to work with.
Cons: 1) You need to be able to heat water safely, preferably in a lasagna pan; 2) It’s expensive, at least the up-front cost is. Over time, of course, you save money by not having to replace them.
TIPS
Stage One: Sculpting the form
Getting Ready
The easiest sculpting material is traditional clay. Sculpy cannot withstand the heat of the boiled plastic. If you use traditional clay, get the stuff that the pottery class has to throw away. You’ll need less of your sculpting material if you make a ‘base’ of newspaper and masking tape, a small bowl, or a half a styrofoam head (the kind used to display hats and wigs). If you use newspaper/tape or a bowl, you will need to remind your students to hold their face up to the mold to mark where the eyes, nose, and edges of the head need to be.
Sculpting
Here’s the first tricky bit. If you are using the more resilient types (like the subset Aquaplast or Resilient T), they will smooth out your model, so you need to sculpt lager, clearly defined features. If you are using ProDrape or any of the Polymer subtypes, they will pick up every bump and wrinkle. The challenge is to make your mold as smooth as possible, with all the features (wrinkles, etc) specific and not too cluttered, although they can be small. The Aquaplast type that is the most “in the middle” is the type also called Aquaplast. IMPORTANT: Make your eyes either eye sockets or big and bulgy; you will be removing them and ned them to be like miniature ‘bowls’.
Stage Two: Laying on the plastic
Heat water in the electric tea kettle that you borrowed from the English Department’s office. Take a metal lasagna pan, and put it on your heat source. Put a little water in it, and fill about 2/3 full with your boiling teakettle water. Bring the first few sculpted forms and put on the table close to the lasagna pan (doesn’t have to be the same table as the water, just close by). Make sure each student has 2 partners—some of this plastic hardens in 10-20 seconds, and you need more than one set of hands!
Put the plastic in the water with a teeny corner peaking out. The plastic will take imprints (the polymer will even show a fingerprint) and fingers are best/least likely to damage your plastic, so that corner is your ‘grab tab’. You can use it to pull out and switch to a different grab tab so the whole plastic piece can be made pliable. The plastic doesn’t really get hot, oddly enough!
When the Aquaplast is clear (unless it’s one of the polymer types), pull it out, shake off the water very quickly, then stretch a bit and lay over the sculpted form. As quickly and as smoothly as possible, press the plastic onto the form. Be careful not to get fingernail marks in the plastic. You will need to pull/pinch up to define ridges, press down and into crevices, and continually use a smoothing/wiping motion to keep it smooth. For the more resilient forms, you will be able to actually mold the plastic, because it takes a little longer to cool (maybe 25 seconds) BUT you will also be fighting it to be sure it holds the form!
Stage Three: Finishing up
There are three things left to do before you can paint, all of which can go fairly quickly. They are Eyes, Edges, and Strap Holes.
Edges
Pull the mask from the sculpted form, take to a sink and wash off the clay, etc. in cold water. Then bring it back to your lasagna pan, which you have had to replenish with hot water. Look at the mask and maybe sketch the outline of the edges in pencil. Then choose a place to begin, and dip that part into the water to heat to almost transparent (do not heat fully). Use scissors to cut away the excess. Continue all the way around the mask. Then, go back to smooth out these rough edges by dipping them just barely into the heated/boiling water till just those edges are transparent. Smooth and round them with your fingers.
Eyes
This is the most challenging, but also the most exciting—slightly changing the shape of the socket profoundly alters the masks’s expression!
Get a dipping cup (like a pyrex measuring cup) or your trusty tea kettle. Using your teakettle at a separate “station” is best, so you can avoid congestion. Holding the mask over a sink, basin, or other hotwater receptacle, pour a small amount into the eyesocket. Let it sit, then pour it out. Repeat 2 or 3 times, then apologize to the mask and poke a slit (horizontal) with a scissor into the cup of the eyesocket, now (hopefully) somewhat pliable. Carefully clip up and down about 1/8-1/5 of an inch. Pour more water in and through, and carefllu make the hole larger. Pour more water through, being sure to wedge in your finger so it doesn’t reseal! Heat the socket enough that you can create a good eyehole (make it larger than you think you need) using your fingers to mold the shape and roll/smooth the edges. Slightly pull out the bottom edge so it doesn’t poke you when you wear it; you can create a real ‘lid’ look which has the advantage of also being very comfortable!
Strap Holes
This is easy. Get a pencil and scissors. Open scissors and put one tip/blade into the boiling water for a moment or two. Then, grasp your mask and pick a spot near wear the temple might be, and apply the hot scissor vigorously, working it ‘swivelingly’ to create a hole. You will have to reheat your scissor once or twice. I usually do it so the scissor pokes through between two spread fingers that are supporting/pushing back from the inside. Now pour a bit of water through the hole and immediately poke your pencil through and leave it there while the hole cools. On the inside of your mask, squish the edges of the hole back down the pencil and flatten/smooth against the inside of the mask so they don’t poke you when you wear it. If they are already hard, dribble a little more hot water on them with the pencil still in place.
Repeat on the other side! You are now ready to paint—acrylics are best. On more quick tip: cut a separate piece of elastic for each side of the mask to tie behind your head to keep it in place on your face. Trying to perfectly size one piece is crazy-making!
Support rabble today!
We’re so glad you stopped by! Thanks for consuming rabble content this year.
rabble.ca is 100% reader and donor funded, so as an avid reader of our content, we hope you will consider gifting rabble with a donation during our summer fundraiser today.
Whether it be a one-time donation or a small monthly contribution, your support is critical to keep rabble writers producing the work you’ve come to rely on as a part of a healthy media diet.
Become a rabble rouser — donate to rabble.ca today.
Nick Seebruch, editor